

Creating a site
Every site in Site Buddy is a real, running development environment with Buddy inside it. You make one with the New site wizard on the Sites page. Anyone in your organization can create a site.
Step 1: Type
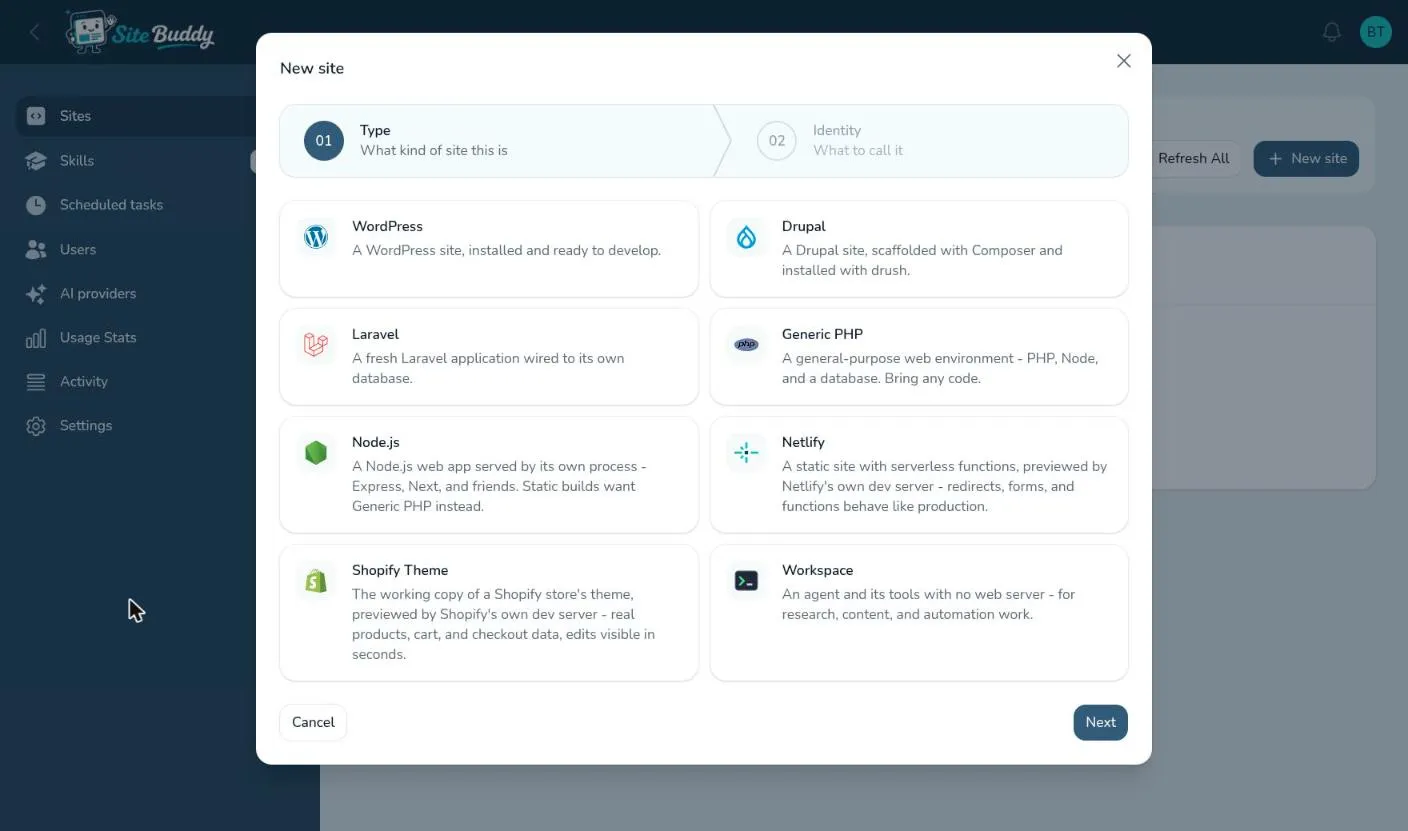
Section titled “Step 1: Type”Pick what kind of site this is. The type decides what the environment comes with.
| Type | Choose it for |
|---|---|
| WordPress | A WordPress site, installed and ready to develop, with its own database. |
| Drupal | A Drupal site, scaffolded with Composer and installed with Drush. |
| Laravel | A fresh Laravel application wired to its own database. |
| Generic PHP | Any other PHP code, or a static site: PHP, Node and a database. Bring any code. |
| Node.js | A Node.js web app served by its own process: Express, Next.js and friends. |
| Netlify | A static site with serverless functions, previewed by Netlify’s own development server. |
| Shopify Theme | Your store’s theme, previewed by Shopify’s own development server with your real products, cart and checkout. |
| Workspace | Buddy and its tools with no website: research, content and automation work. |
Not sure? For an existing site on a platform not listed, Generic PHP (or Node.js for a JavaScript app) takes nearly anything. See bringing an existing site.
Step 2: Identity
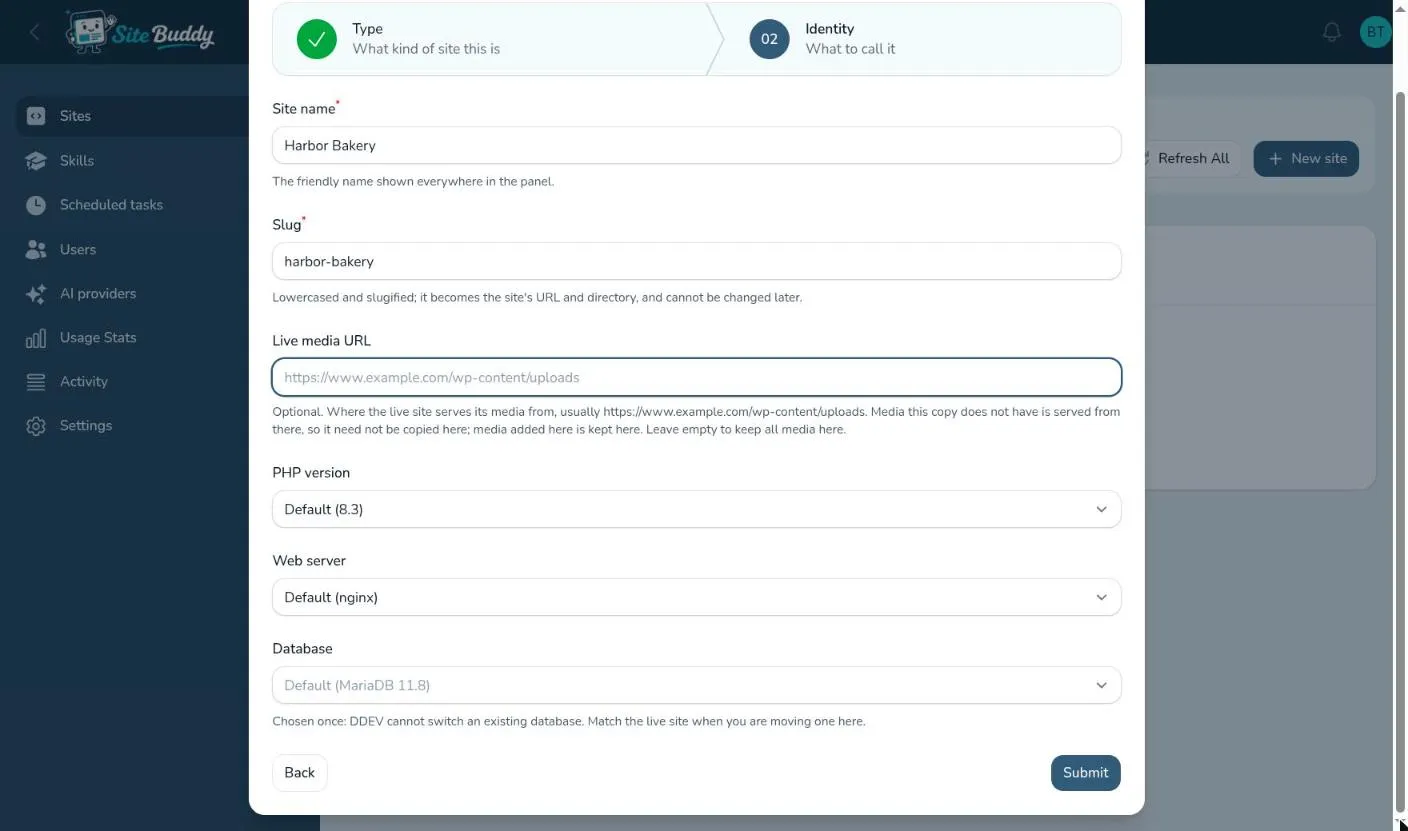
Section titled “Step 2: Identity”- Site name: the friendly name shown everywhere in Site Buddy. You can change it later.
- Slug: filled in from the name. It becomes part of the site’s preview address and cannot be changed later, so check it. It must be unique.
- Live media URL (WordPress only, optional): the address of the live site. Images and uploads this copy doesn’t have are shown from the live site, so you don’t have to copy a large media library across.
- PHP version, Web server and Database (PHP-based types, optional): leave them on Default unless you are moving an existing site here, in which case match what the live site uses. The database type is chosen once and cannot be switched later; the PHP version and web server can.
Step 3: Hosting (Netlify and Shopify only)
Section titled “Step 3: Hosting (Netlify and Shopify only)”Netlify and Shopify sites work against a real account, so the wizard asks for its credentials:
- Netlify: the Netlify site ID and a Personal access token.
- Shopify Theme: the Store domain (yourstore.myshopify.com), a Theme Access password, and the Storefront password if the store is password protected.
Both have an optional Agent usage notes field for anything Buddy should know about the account. Site Buddy checks the credential before creating the site; if it is wrong you see the problem under the field and can fix it straight away. Like every credential in Site Buddy, Buddy never sees it.
While the site is built
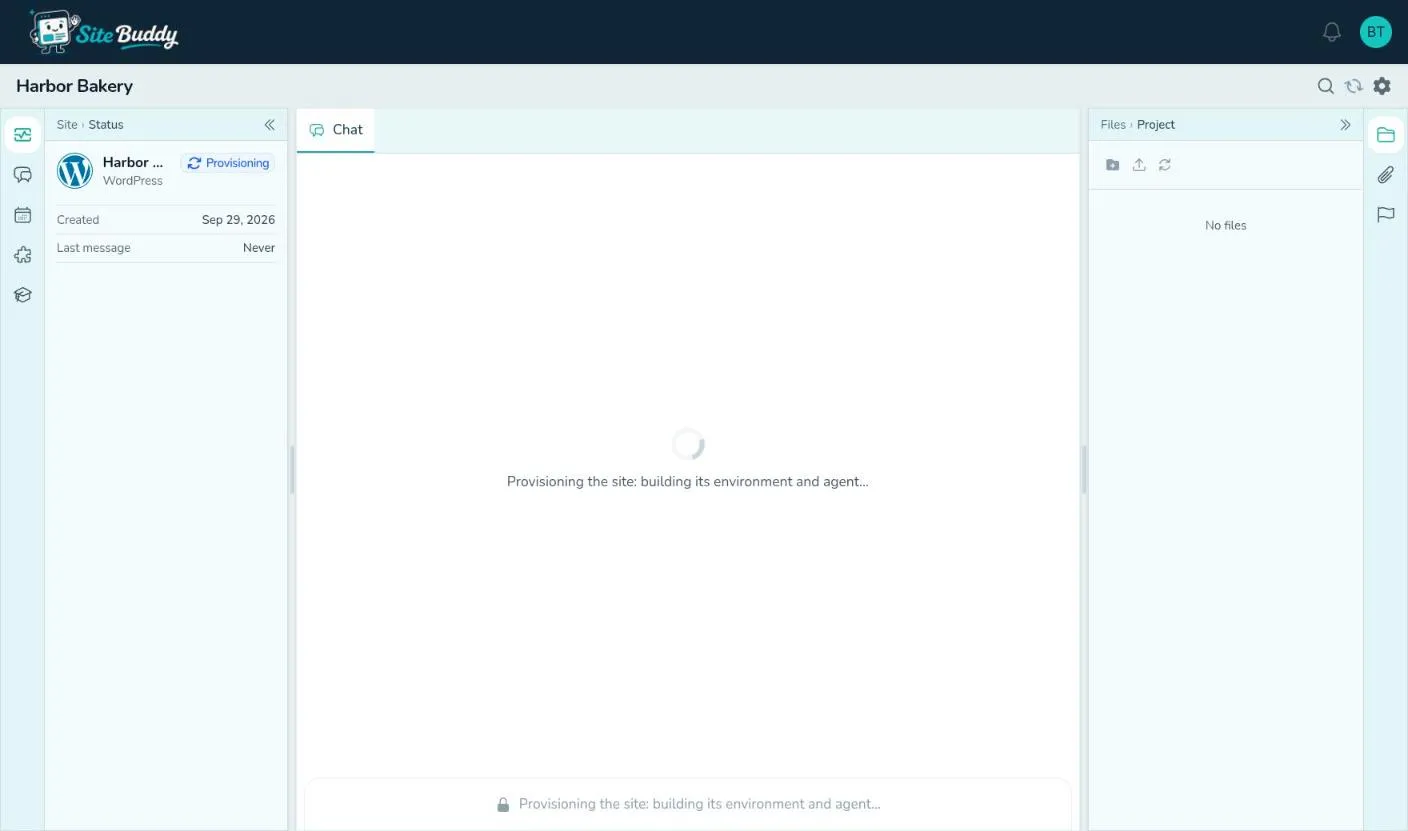
Section titled “While the site is built”After Submit you land in the new site’s workspace. Its status reads Provisioning (or Verifying first, for Netlify and Shopify), and the chat shows a spinner: “Provisioning the site: building its environment and agent”. A WordPress site is usually ready in a couple of minutes. You can leave the page and come back; the site keeps building.
When it is ready the chat unlocks and Buddy is waiting. If something went wrong, the chat says the site did not provision; delete it from the Sites page and try again, or contact us if it keeps happening.
New sites are private
Section titled “New sites are private”Every new site starts behind the lock page: only your team, and people you add by email, can see its preview. Turn that off in the site’s settings when you want it public.
Next: managing your sites.